How to Grow Microgreens
Zones 1a–11b · Beginner · 7–21 days
Balcony/patioIndoor-friendly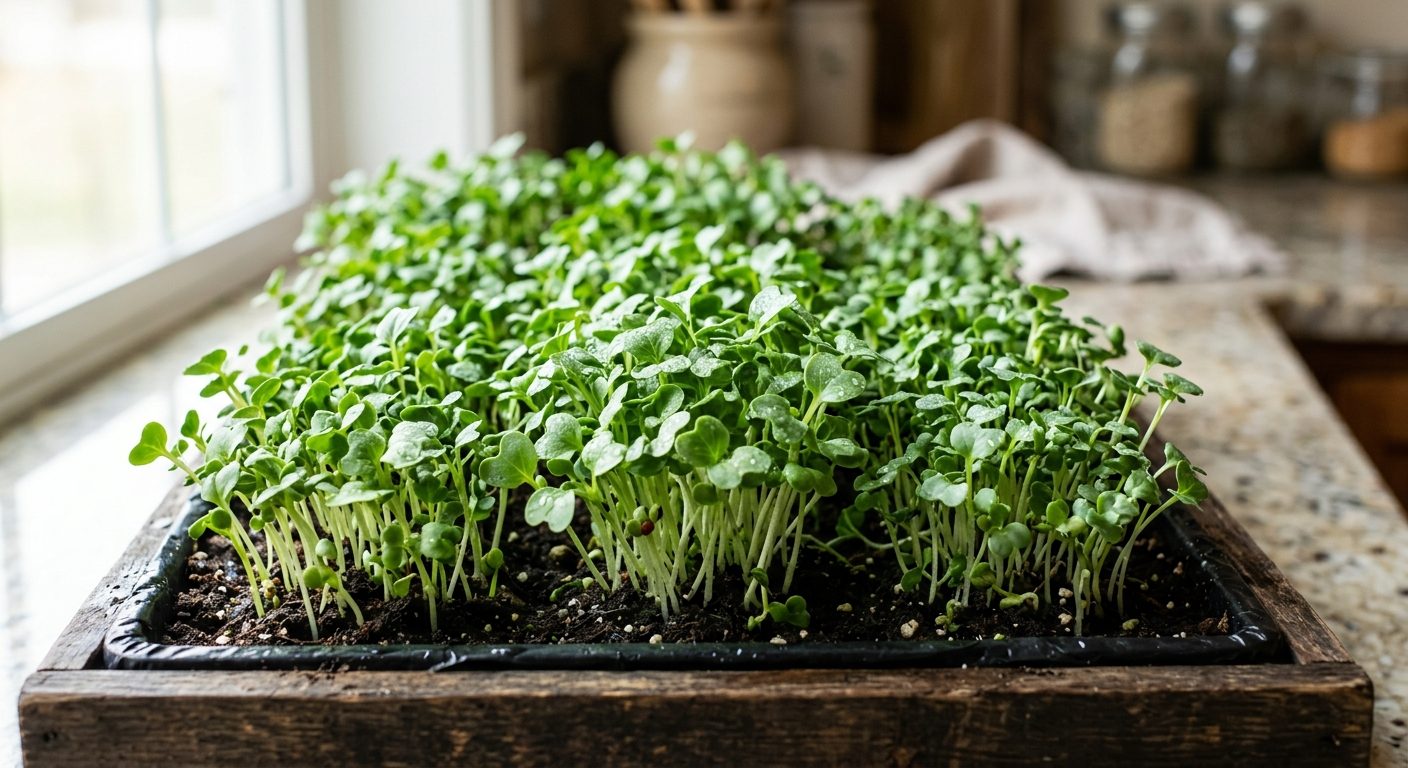
Microgreens grow indoors in any zone any climate — they need no garden just a tray some soil and light.
Light
Water
Soil
Days to harvest
When to plant Microgreenses
Your exact dates depend on your last frost date. Enter your location to get your personalized planting calendar.
In general: direct-sow or transplant after your last frost, and expect harvest ~7–21 days later. See zone 1a →
Growing guide
Overview
Microgreens are young, edible seedlings of vegetables, herbs, or grains harvested just as the first true leaves appear. Growers love them because they mature in 7–21 days, need little space, and can be grown indoors year-round. They need a shallow tray of well-drained seed-starting mix, bright indirect light or a grow light, and evenly moist but not soggy medium.
Soil & planting prep
Use a fine-textured, well-drained seed-starting mix or coconut coir rather than garden soil. A pH near 6.0–6.5 is common for seed-starting mixes, but drainage and a fine, uniform texture matter more for microgreens. Broadcast seeds densely on the surface and press them lightly; most seeds need little or no covering.
When to plant
You can start microgreens indoors any time of year in USDA zones 1a–11b because they do not need an outdoor growing season. They are not frost-tolerant, so do not set trays outside before your last frost date unless they are in a protected, warm indoor spot. If you grow them on a cool windowsill or porch, wait until after the last frost date to avoid cold drafts.
How to plant
- Fill a clean shallow tray 2–3 inches deep with 1–1.5 inches of moist, well-drained seed-starting mix or coconut coir, and level it gently.
- Broadcast seeds evenly and densely across the surface, aiming for seeds nearly touching but not piled or overlapping.
- Press the seeds lightly into the medium with your hand or a flat board. Cover only with a very thin layer of mix if the seed packet says darkness helps germination; otherwise leave tiny seeds uncovered.
- Mist the surface well and cover the tray with a clear lid or plastic wrap until the first seeds sprout, checking daily so the surface does not dry out or mold.
- Once sprouts appear, remove the cover and place the tray in bright indirect light or under a grow light for 12–16 hours daily. Water from the bottom to keep the medium evenly moist.
5 common mistakes to avoid
- Sowing seeds too thickly so they pile on top of each other creates a dense mat that traps moisture and promotes damping-off; broadcast seeds so they are nearly touching but still in a single layer.
- Leaving the humidity dome or plastic wrap on after germination keeps humidity too high and invites mold; remove the cover as soon as sprouts are visible and add gentle airflow.
- Watering from overhead after seedlings emerge knocks down fragile stems and wets the foliage, which can lead to mold; switch to bottom-watering by filling the tray base once roots reach the lower medium.
- Using heavy garden soil or standard potting mix instead of a light seed-starting mix holds too much water and can carry pathogens; use sterile, fine-textured seed-starting mix or coconut coir.
- Harvesting too late, after true leaves have fully expanded or stems have become tall and tough, reduces tenderness; cut microgreens as soon as the first true leaf appears, usually 7–21 days after sowing.
Harvesting & storage
Harvest when the first true leaves appear, typically 7–21 days after sowing, when seedlings are about 1–3 inches tall. Use clean scissors to cut stems just above soil level, leaving the root mass behind. Eat immediately for best texture, or store dry and unwashed in a covered container lined with a paper towel in the refrigerator and use within 3–5 days.
Companion planting
Microgreens are grown densely in trays, so traditional companion planting does not really apply. If you sow them outside as baby greens, keep them in partial sun and avoid tall or spreading crops that will shade them out.
Growing in containers
Microgreens are not a conventional container vegetable; they are best grown in shallow seed trays with drainage rather than in a standard pot or open garden bed. A 10x20-inch tray with 1–1.5 inches of medium is the usual setup, so no deep container is needed.
Pro tips
Sow seeds densely in a shallow tray with seed-starting mix. Keep moist and bright or under a grow light. Harvest with scissors just above soil level when first true leaves appear.
Grow Microgreenses this season
Get microgreens seeds and supplies matched to your climate.
Shop microgreens seeds →We may earn a commission when you buy through links on our site. Full disclosure.
Frequently asked questions
How long do Microgreenses take to grow?
Microgreenses take about 7–21 days.
What zone does Microgreens grow in?
Microgreenses grow in USDA Hardiness Zones 1a–11b.
Can you grow Microgreens in a container?
Microgreenses are usually grown in the ground or a large raised bed rather than a container.
Is Microgreens hard to grow?
Difficulty: Beginner. Microgreens grow indoors in any zone any climate — they need no garden just a tray some soil and light.
Is Microgreens safe for dogs and cats?
Microgreenses are safe for both dogs and cats.
More plants to grow
Popular guides readers also check.
🌱 Get microgreens planting dates for your zone
Get your personalized "what to plant and when" calendar for your zone — plus tips when each crop is ready. Free, unsubscribe anytime.